|
User Guides — Project Tool |
|
The Project Tool is used to create, edit, review, and monitor project information over the course of a project’s lifecycle. Project staff keeps project information up-to-date. Key documents are stored on the system for each project. At any time the project may be updated, reviewed, and reported. The tool enhances and supports DHA’s goal of having visibility into all MHS projects. This gives DHA the ability to access up-to-date information about each project, and provide standard content to Congress and MHS Executives when requested. It is not visible to non-registered users. If you have a requirement to use the Project Tool, please request access by using the wizard at "User Registration Instructions" or clicking the "Request Access" button on the main menu. Project TypesThere are two types of Projects in the WCF Project Tool.
Project Teams and PrivilegingThis section talks about the capabilities offered under the "Team" button at the top of the project page. Clicking on that button (only visible if you have the necessary privilieges to manage the project team) offers four options in a sub-menu of buttons, labeled,
Let's review the functionality offered by each button. Editing Team MembershipIn order to access a project, a user needs to be given access. We do this by having the Project Manager add the user to the Project Team. All members of a Project Team have the ability to select a project, and see the resources that are in it.
Project Team RolesIn addition to the basic privilege levels of NonGov, Gov, and Exec users, team membership offers another layer of security to project managers. In addition to the privilege levels, there are three different roles within a project team.
Edit a Team
The Project Team identifies users of the WCF Toolkit who are able to work within a particular project. The Project Manager has the ability to manage team membership. As always, there are abilities to Add, Edit, and Delete members. If you have the necessary privileges to manage team membership, you will see a button at the top of the project page labeled "Team" (shown above). Clicking on the "Team" button will open a secondary set of buttons under the first.
Clicking on the first button, "Edit Team", brings up a modal dialog offering the ability to manage the list of users.
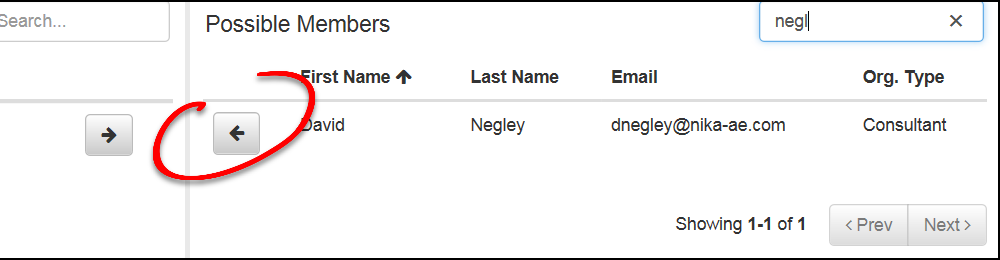
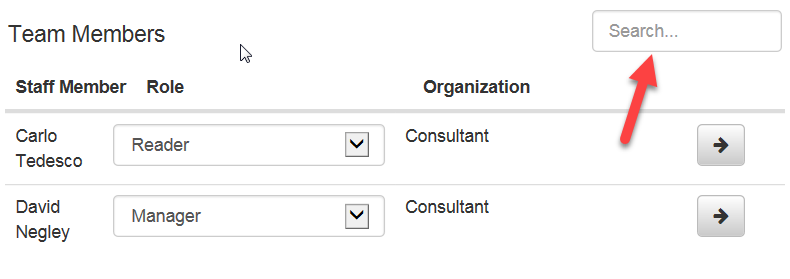
This modal contains two lists. On the left side is a list of existing team members. This list shows the name, role, and organization for each member. On the right side of the form is a list of potential members who can be added to the project. By default, this list contains all users in the Toolkit application. If the name or email address is already known, entering that value into the text box at the upper-right allows the manager to find candidates quickly. AddOnce you have identified the user you would like to add to the project, click on the left-facing arrow to move that user from the candidate list to the active member list. Then set the member participation role to "Manager", "Contributor", or "Reader". The Organization field is not editable—it will be supplied by the application.
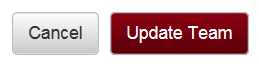
When you are done managing members, click on the "Update Team" button at the lower-right corner of the screen. Important: If you exit the dialog box without clicking on the "Update Team" button, any changes you have made will not be preserved.
DeleteRemoving members from the team is just as easy as adding them. Click on the "Edit Team" button to bring up the management dialog, as we see above. Identify the member you wish to remove from the team, and click on the right-facing arrow:
The same capability for locating a desired user is provided on the left side of the dialog, in a Search box at the upper-right corner of the column. As you type, the list will change to reflect the value entered. Oncwe you have identified the user to remove, click on the right-facing arrow to complete the action. Important: If you exit the dialog box without clicking on the "Update Team" button, any changes you have made will not be preserved.
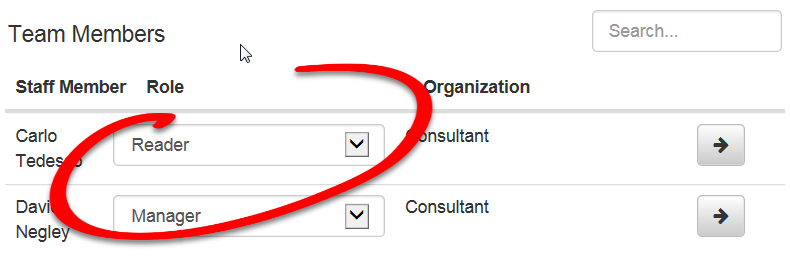
Modify User RoleIf the need arises to modify the access level of a team member, bring up the team editor page by clicking on the "Team" button, followed by the "Edit Team" button. Locate the desired team member on the left column by either scrolling down, or use the Search box at the top of the column. Select the desired Role from the combination box labeled from the candidate list to the active member list. You can set the member participation role to "Manager", "Contributor", or "Reader".
When you are done managing members, click on the "Update Team" button at the lower-right corner of the screen. Important: If you exit the dialog box without clicking on the "Update Team" button, any changes you have made will not be preserved.
Emailing Project Teams
Automating EmailsClicking the "Email Team" button will invoke your default email client, with certain information pre-filled. This allows you to easily disseminate questions, concerns, updates, and comments to all members of the team.
Email Assist
Clicking the "Copy Email" button will bring up a modal window containing the default values described in the previous section. This allows you to copy/paste these values into a web-based email client, since the WCF Toolkit cannot automatically start such a browser-based application. Team History
The Team history is accessed through the "Team history" button on the menu buttons at the top of the page. This screen offers a review of the changes that have been made to the project team. It indicates when members were added, removed, or had their role changed within the project.
Project FoldersThe WCF Toolkit makes use of a folder structure, similar to that of Windows Explorer, to group related resources within a project. The names of these folders, and their relations to one another, are comletely up to the project manager. Like Windows Explorer, the WCF Toolkit allows for folders to be added, renamed, moved, and deleted. These functions are all accessed through a menu on the project page. This menu is accessed through the icon known as a "Hamburger Menu" that immediately precedes the name of the current folder, just above the resource list.
The Hamburger Menu will only be visible if you have sufficient privileges (Project Managers or Project Tool Administrators or System Administrators) to modify the project. It will also be hidden if you have selected the "View All Project Resources" item in the folder tree.
Clicking on the Hamburger Menu will cause a small window to popup, showing four actions from which you may choose by clicking on an option. All actions with folders include first selecting the folder upon which you want to perform an action. Then go to the Hamburger Menu and click on it, showing the popup menu. Then you can select the desired action.
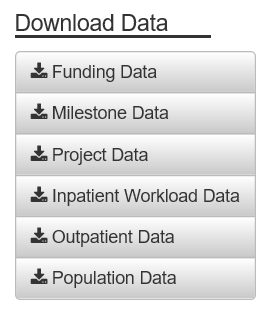
Legacy Data
These buttons exist on the "Details" tab of the Project View, and allow you to download selected data in the form of an Excel spreadsheet. Once you have downloaded the spreadsheet, you can use it to review historical data and create charts for presentation. Project ResourcesResources may be listed independently in the Knowledge Center, or they may be grouped together into Projects. Resources that are grouped together as part of a project may be marked so that they are also visible to users in the Knowledge Center. For more information about Resources and how to manage them, see the "Resources" tab on the "How to Use this Site" page. Managing ProjectsOnly Project Tool Administrators have the ability to create and manage Projects. This section is only relevant if you are a Project Tool Admin. Creating a ProjectDepending on the type of project you wish to create, you will follow one of two paths on the navigation menu:
Each option will present you with a screen containing fields necessary for tracking that kind of project. Fill in the information, and click on the "+ Create" button. Editing a ProjectStart by navigating to the Projects list by following the menu item "Tools | Project Tool | View Projects". Using the Filters and Search Criteria (see "How to Search" on the "How To Use This Site" page for more information), identify the project you wish to edit. Click on the Project Name to bring up the main Project page. This page resembles the Windows Explorer application, offering a view of any Folders (see below) and Resources contained in the Project. Opening/Closing a Project
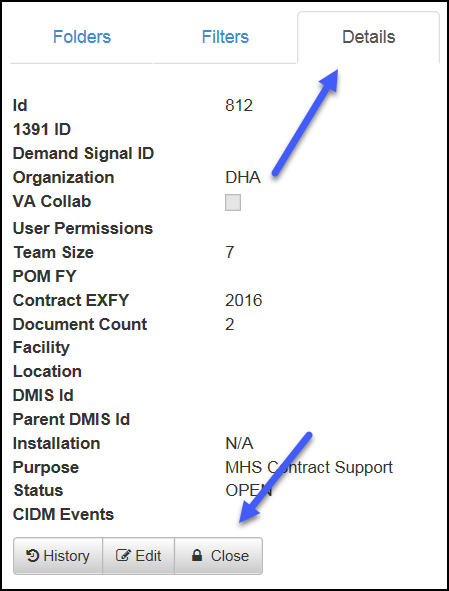
If one is a Project Manager or a Project Tool Admin User, there is the option to "Close" a project, and subsequently re-open it, if necessary. This is done in the Details tab of the Project page, as shown here. Visit this page by following the navigation: Tools | Project Tool | View Projects. Then, using the Search fields, find and select a project. Once there, look to the left of the page and select the "Details" tab. This will reveal more information about the project, and also several command buttons (exactly which ones will depend upon your access and the state of the project). In an Open project, the option to "Close" the project will be available. If the project is already Closed, then the button shown here will say Clicking on the "Close" button will take you to a confirmation dialog, asking you to fill in a reason for closing the project. The "Reason" field is a dropdown, offering a list a standard possibilities. If you need to provide further explanation, there is a "Notes" field where you can enter that information. Similarly, when you reopen a closed project, you will be presented with a confirmation screen where you can enter notes on the reason for the change of status. |