|
User Guides - CIDM |
|
Capital Investment Decision ModelThis module of the World-Class Facilities Toolkit allows users to create a framework for determining which projects are feasible for the coming period. It is not visible to non-registered users. If you have a requirement to use the CIDM Tool, please request access by clicking the "Request Access" button on the main menu. CIDM EventsCIDM Events are periods of performance for submitting projects for evaluation and scoring, in order to determine if the projects are appropriate and sustainable. These events are usually one-year periods, though there is no reason that may not change in the future. Only members of the authorized CIDM Planning Team may create and edit CIDM Events. After that, Project Planners will submit their proposals using the Artifacts provided by the Planning Team. These materials will then be scored by the CIDM Scorers. Who Uses CIDM?How one uses this tool depends upon the functional role in the cycle. There are three main user types:
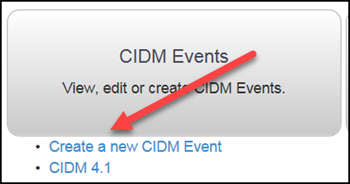
The rest of this guide will speak to each of the user types, separately. CIDM for Event PlannersCIDM EventsCreate the CIDM EventThe easiest way to create the CIDM Event is to use the quick link on the CIDM Landing Page under the Tools menu. To navigate there, click on the Tools menu item, then on the CIDM menu item. Then select "CIDM Landing". This takes you to the page displayed above.
Clicking on the "Create a new CIDM Event"" link will take you to the page for editing a new CIDM Event, where you can fill in the Title and Description for the new CIDM Event. "Phase" is not yet available for editing until after the Event has been created—it will be defaulted to "Setup". Edit the CIDM EventOnce you save the new CIDM Event, you will be taken to a page where you can update the Event with:
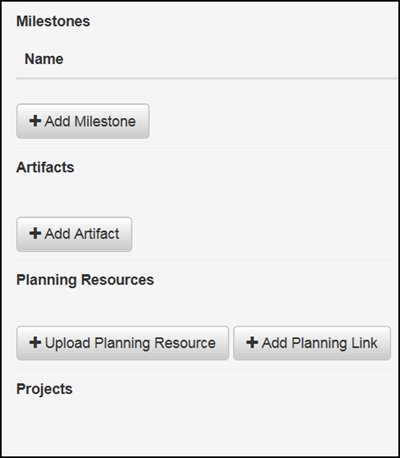
CIDM MilestonesAdding a MilestoneClick the "Add Milestone" button to reveal two fields—Name and Date. Fill in these values and click the "Save" button. The values you entered will then be displayed in a list form above the "+ Add Milestone button." Editing a MilestoneAs Milestones are created, they will form a list above the "+ Add Milestone" button shown above. At the end of each item, you will see two buttons, labelled "Edit" and "Delete". Click on the "Edit" button in order to change your values. Then click "Save" to update with your changes. Deleting a MilestoneWhile viewing the list of Milestones, you will notice the "Delete" button that appears at the end of each row. Click this button in order to initiate the deletion. You will be presented with a confirmation dialog box, asking you to type the word "delete" (it is NOT case-sensitive) into a text box to confirm your intention to delete the Milestone. After you have typed in the value, click on the button labeled "I understand, and wish to delete". You will be returned to the Edit page, with a message confirming that the deletion was successful. ArtifactsAdding an ArtifactIn order to associate an Artifact with the CIDM Event, click on the "+ Add Artifact" button, as seen above. This will bring up a list of pre-defined Artifacts in a pick list (See "Artifact Design Tool" below). You can check as many items as you would like from this list. Then click on the "Add Selected Artifacts" button at the bottom of the page. You will be returned to the Edit page, with a message confirming that the Addition was successful. The selected Artifacts will now appear in a list above the "+ Add Artifact" button. Editing an ArtifactAs Artifacts are added to your CIDM Event, they will form a list above the "+ Add Artifact" button shown above. At the end of each item, you will see two buttons, labeled "Edit" and "Delete". Click on the "Edit" button in order to modify the Artifact. You will be taken to the "Artifact Design Tool", where you can make changes to the Artifact. When you have saved your changes to the Artifact, press the "Return" button to return to the View CIDM Event page. You can continue modifying your CIDM Event by clicking on the "Edit" button at the top-right of the page. Removing an ArtifactWhile viewing the list of Artifacts, you will notice the "Delete" button that appears at the end of each row. Click this button in order to initiate the deletion. You will be presented with a confirmation dialog box, asking you to type the word "remove" (it is NOT case-sensitive) into a text box to confirm your intention to delete the Artifact. After you have typed in the value, click on the button labeled "I understand, and wish to remove". NOTE: This process will NOT delete the artifact from the system. It will only sever the relationship between the Artifact and your CIDM Event. You will be returned to the Edit page, with a message confirming that the removal of the Artifact from the CIDM Event was successful. Planning ResourcesAdding a Planning ResourceIn order to associate a Planning Resource with the CIDM Event, click on the "+ Add Planning Resource" button, as seen above. This will bring up a dialog box where you can enter a Title and Description for your resource, and upload a document containing the information you wish to share. NOTE: You can only associate ONE resource file at a time. When you have selected your Planning Resource file, click on the "Submit" button to attach the document to your CIDM Event. You will be returned to the Edit page, with a message confirming that the upload was successful. The selected Planning Resources will now appear in a list above the "+ Add Planning Resource" button. Editing a Planning ResourceAs Planning Resources are added to your CIDM Event, they will form a list above the "+ Add Planning Resource" button shown above. At the end of each item, you will see two buttons, labeled "Edit" and "Delete". Click on the "Edit" button in order to modify the Planning Resource. You can edit the Title and Description fields, or associate a completely new file with the resource. When you have saved your changes to the Planning Resource, press the "Submit" button to return to the Edit CIDM Event page. Removing a Planning ResourceWhile viewing the list of Planning Resource, you will notice the "Delete" button that appears at the end of each row. Click this button in order to initiate the deletion. You will be presented with a confirmation dialog box, asking you to type the word "delete" (it is NOT case-sensitive) into a text box to confirm your intention to delete the Milestone. After you have typed in the value, click on the button labeled "I understand, and wish to delete". You will be returned to the Edit page, with a message confirming that the deletion was successful. Planning LinksPlanning Links work just like Planning Resources, except that you enter a web site URL, or a link to a Toolkit repository resource, instead of uploading a document file. ProjectsAdding Projects
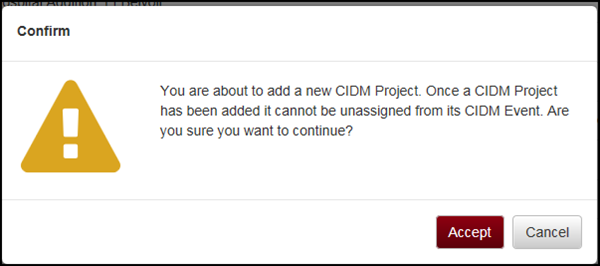
To add a project to the CIDM Event, just click on the "Add a Project" button to the right of the screen. This will present you with a pick list of all the projects in the Toolkit Project Tool. Select all that are appropriate by clicking on the checkbox to the left of each row. Then click on the button that says "Add n CIDM Projects". You will be shown the following confirmation dialog box:
If you wish to proceed, click on the "Accept" button. The projects will be created in CIDM, and you will be returned to the CIDM Event Edit page. IMPORTANT: Assigning a project to the CIDM Event cannot be reversed! There is no "Delete" or "Remove" function to break the association. Artifact Designer
Artifacts are instructions and templates guiding planners on how to submit their project proposals for consideration in the coming CIDM Event. CIDM ArchivesAt the close of each CIDM Event, mark the Event as "Complete". This will prevent further modifications to the Event, and move it to the "Archive". The Event will show up on listings of CIDM Archives, but will only allow review of projects and resources for historical purposes. CIDM for Project PlannersAs a project Planner you will need to develop materials for each facility planning project that has been selected for the CIDM process. In order to develop these materials you will need to use the CIDM tool to obtain planning resources and submit your final materials for scoring. Below is a step by step process of how you should use both the Project Tool and the CIDM tool develop and submit your materials. AccessGet access to your CIDM projects. The CIDM planning team will set up the CIDM event with all of the projects. If you have any projects up for the current round of CIDM then you will need to be given access to the CIDM event for your project. Obtain ArtifactsOnce you have obtained access you will need to obtain all of the artifact templates and planning resources for this round of CIDM:
Develop Resources OfflineOnce you have all of the Artifact Templates and Planning resources, you can then develop your materials offline. You should store your working materials in the Project Tool by logging into the Project Tool and finding the Project for your Facility Project, and create a folder for the current round of CIDM if one does not exist:
Submit/Upload Your ResourcesOnce your feel that your artifact materials are ready to be submitted for scoring you will need to navigate to the CIDM tool and import the finished materials you developed within the Project Tool.
Indicate Completion When ReadyOnce all materials have been uploaded for an artifact you will need to click the button labeled "Mark as complete" in order to signify to the CIDM administrators that the artifact is ready for scoring. CIDM for Project ScorersGo to the main CIDM Landing page and select the current CIDM Event from the list of Events under the "CIDM Events" panel. This will take you to a page displaying all Milestones, Artifacts, Planning Resources, and Projects for the Event. In order to download the submitted information for review and scoring, click on the button labeled "Download All Event Resources". |